/body> >

Saturday 6 August 2022

Chettinad Vegetable Biryani Recipe


Chettinad Vegetable Biryani is a flavorful and aromatic rice dish from the Chettinad Cuisine. This Vegetable Biryani uses freshly prepared Biryani masala which imparts a spicy taste and wonderful aroma to the dish. This is a quick one-pot Biryani that is delicious vegan, gluten-free and can be paired with any raita for a soulful meal. 

A little about Chettinad Cuisine : 

Chettinad Cuisine is the cuisine of the Chettinad region of Tamil Nadu. Food from this state is predominantly vegetarian due the majority of Tamil Brahmins. The Chettinad region comprises of 76 villages and 2 towns and is dominated by the Chettiar community. Cuisine of Chettinad is uses a variety of freshly ground spices including cumin, fenugreek, fennel, clove, bay leaf, turmeric and tamarind. The cuisine is well known for the complexity of flavours. 

The traditional Chettinad cuisine is well known for using so many varieties of spices like star anise, whole red chilies, fennel seed, cinnamon, cloves, bay leaf, peppercorn, cumin seeds and fenugreek. In Chettinad cuisine, common “secret” ingredients are dried flower pods, and kalpasi (black stone flower). The richness of the gravies is increased by addition of tomatoes, coconut, ginger and garlic. 


Related event : Chettinad Cuisine @Shhhhhh Cooking Secretly Challenge

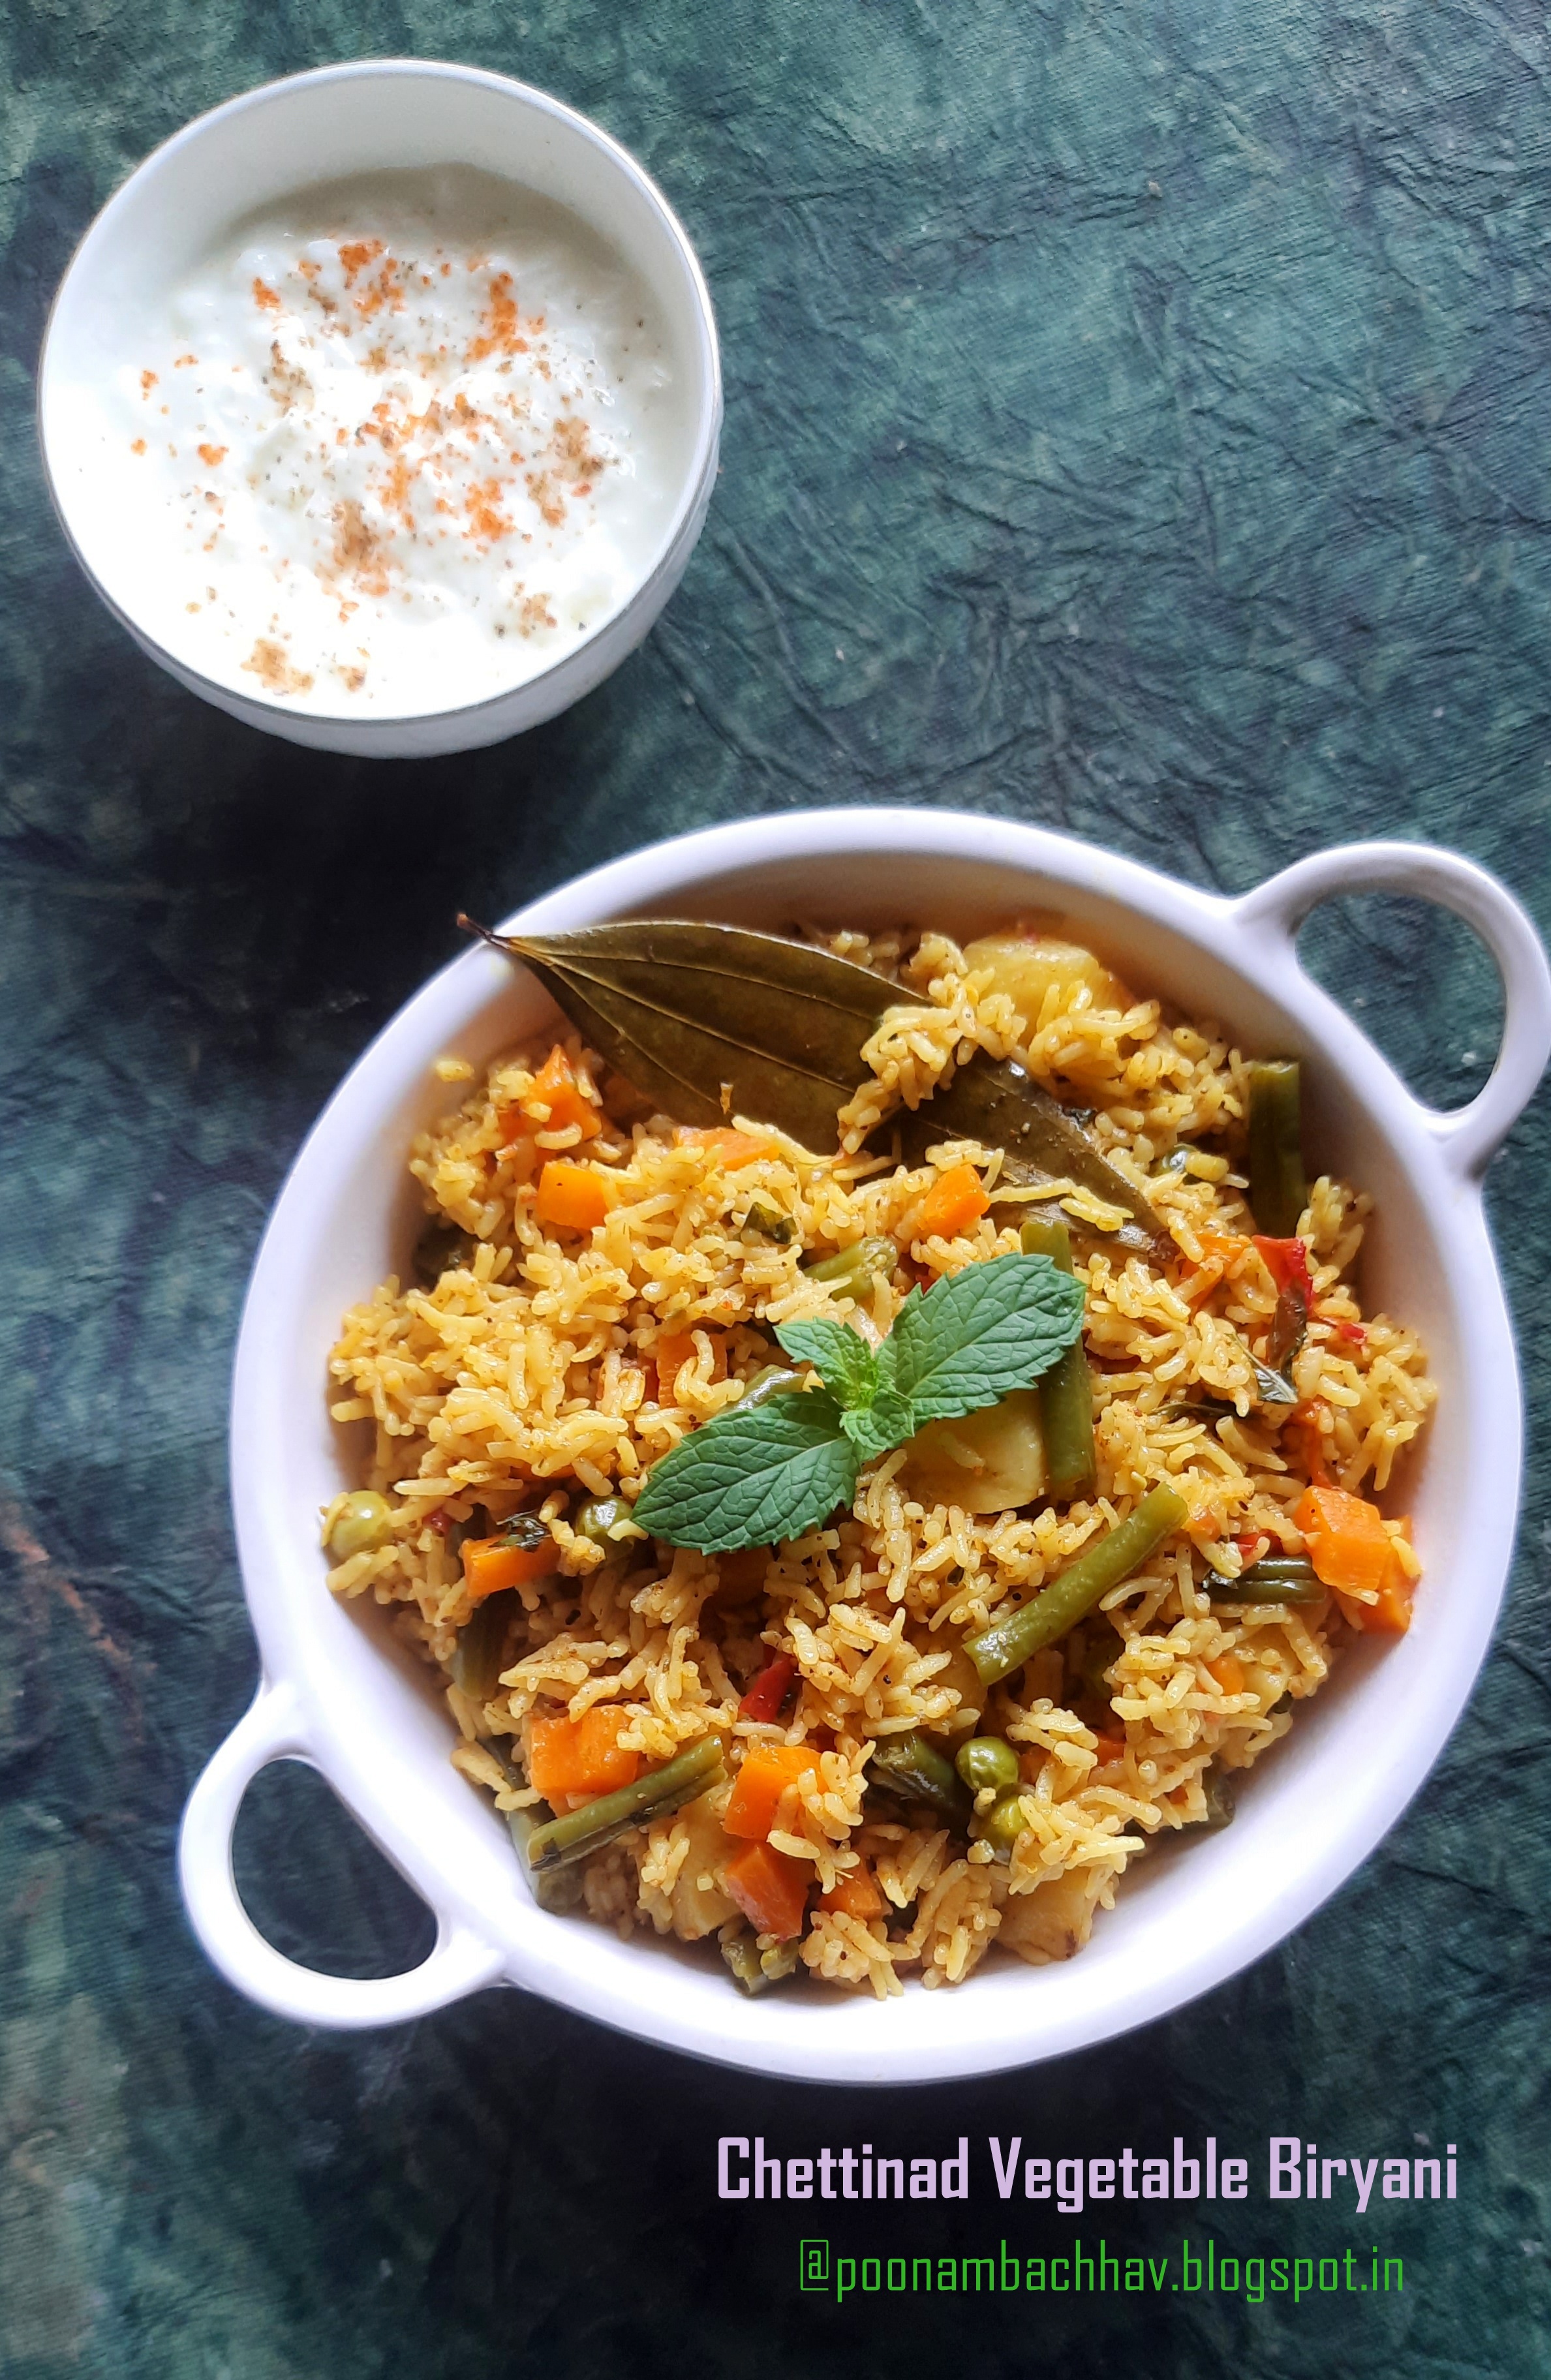
This Chettinad style Vegetable Biryani recipe is featured in the Facebook Gourmet group, Shhhhhhh Cooking Secretly challenge. Here, participating members take turn to propose the theme for each month. Kalyani Sri who was our hostess for the month of July, proposed Chettinad Cuisine as the theme. You might love to try out her Vegan Chettinad Curry.

In this group all participating members are divided into pairs and both partners exchange a set of secret ingredients, using which both have to cook a dish depending upon  the theme for the particular month. Once the dish is ready only the picture of the dish is shared on the group and the other group members take turn in guessing the secret ingredients just by looking at the picture of the dish. The secret ingredients and the dish name are revealed at the end of the month when the recipe is published by the respective blogger.

My partner for the Chettinad Cuisine theme was Narmadha and she gave me mint and Kalpasi as my 2 secret ingredients and i made this flavorful and aromatic Chettinad style Vegetable Biryani using the ingredients. In return, i gave her coconut milk and Cinnamon and she made this Chettinad Chicken Biryani  using the set of ingredients.

Typical Chettinad style vegetable Biryani uses shallots (small sambar onions) and garlic, here i have made an onion-garlic version, as we refrain from using onion and garlic in Sawan month. Apart from that, Authentic Chettinad recipe uses a small fragrant variety of rice called Seeraga Samba Rice, i have used Sona masori rice to make this Biryani as i could not source it. 

Ingredients for Chettinad style Biryani masala ( to roast and grind)
  • 1 inch cinnamon (Dal Chini)
  • 2-3 green cardamom pods (elaichi)
  • 1 teaspoon fennel seeds (saunf)
  • 4-5 black pepper corn (kali mirch)
  • 2-3 cloves (laung)
  • 2 stone flower (dagad Phool) / Kalpasi
  • 1 star anise (chakri phool)
Ingredients for the Biryani 
  • 1 cup rice ( preferably use Seeraga Samba Rice)
  • 1 small carrot diced
  • 1 potato , diced
  • 4-5 french beans, chopped lengthwise into 2 inch pieces
  • 1/4 cup green peas
  • 1 tomato , chopped
  • 1 sprig curry leaves
  • 1 bay leaf
  • 1/4 cup  mint leaves
  • 2 green chilies
  • 1/2 inch ginger
  • 2 tablespoon oil / ghee
  • 1/4 teaspoon caraway seeds (shah jeera)
  • 1/4 teaspoon turmeric powder
  • 1 teaspoon red chili powder
  • 1 tablespoon coriander powder
  • Salt to taste                    

Method:
  1. To begin with making Chettinad style vegetable Biryani, get all the ingredients ready. Chop the veggies, rinse and soak the rice for 30 minutes.
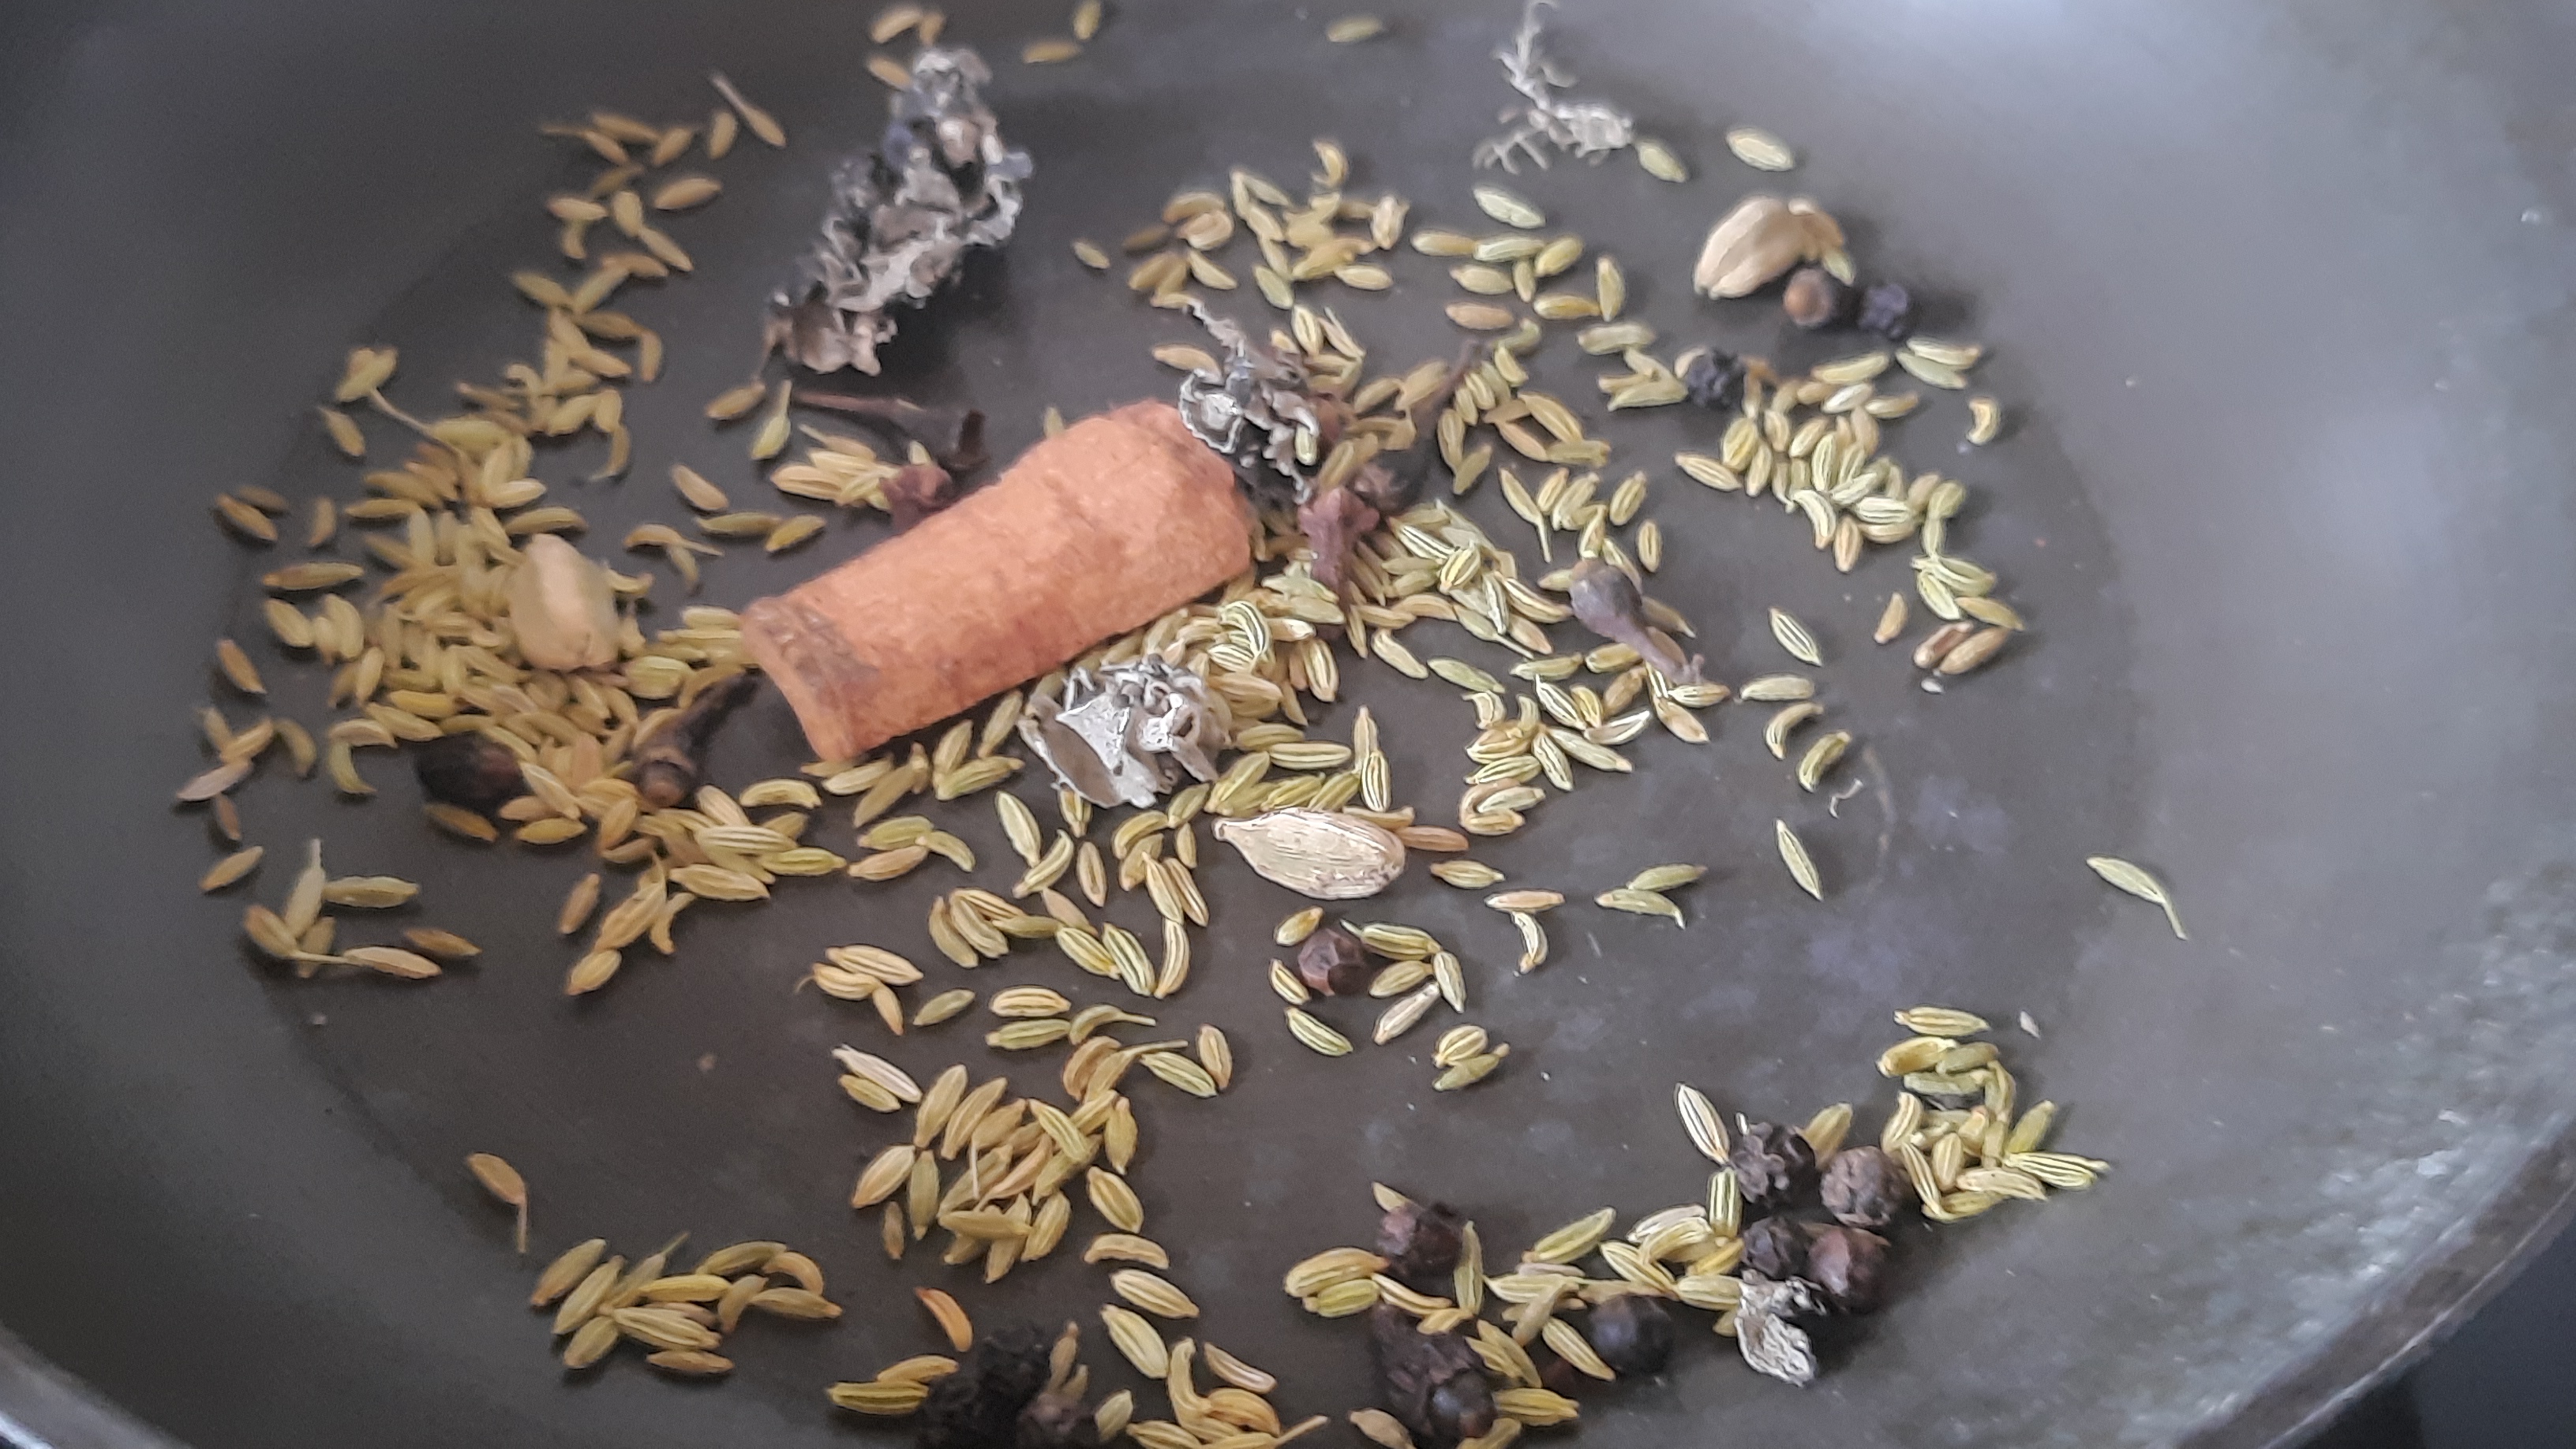
  2. Now, we will start with making the Biryani masala. For that in a sauce pan on medium flame, dry roast all the spices listed under biryani masala in the list of ingredients. Make sure you do not burn the spices, just roast them on low to medium flame so that they release their essential oils and impart a lovely aroma and flavor to our biryani.
  3. Allow the spices to cool down. transfer them to a grinder jar and make a fine powder. This is our Biryani masala.
  4. To make the Biryani, heat ghee or oil in a pressure cooker on medium flame.
  5. Add caraway seeds and bay leaf to it. Once it sizzles add the curry leaves followed by green chili ginger paste and saute for 30 seconds. Add chopped tomato and saute until they turn mushy. 
  6. At this stage, lower the flame and add the turmeric powder, red chili powder and coriander powder and stir fry the spice powders for about 30 seconds.
  7. Next, tip in the chopped veggies and stir fry for another 1-2 minutes.
  8. Add the washed, soaked and drained rice and stir fry for another 1 minute.
  9. Add 2 1/2 cups hot water to it. season with salt to taste. Now tear mint leaves roughly and add to it. Cover the pressure cooker with lid and pressure cook the biryani on medium flame for 2 whistles.
  10. Open the lid of the cooker, once all the  pressure has been released. Fluff the rice using a fork and serve the flavorful and aromatic Chettinad Style Vegetable Biryani with curd or raita and papad and enjoy with your loved ones !


Would love to hear from you !

I hope you would love trying out this healthy, aromatic and flavorful Chettinad style vegetable Biryani. If you do so, feel free to share your feedback with us in the form of likes and comments in the section below this post.

All your suggestions are more than welcome. If you like my work, and feel that it is worth following, do hit the follow button on the top right corner of this blog. Your appreciation means a lot to me. It gives me the inspiration and motivation to keep doing my work and give my best each time.

If you like my work and want to be updated with new recipes, do follow us on various social media platforms. My social media handles for your kind reference are as follows. 


You Tube Channel English :

 https://www.youtube.com/channel/UCasKW9Cq5khnTS3JnJ43m2A 

You Tube Channel Marathi : 

https://www.youtube.com/channel/UC5lWdtDq45pDz04dJeezw7A

You Tube Channel Hindi :

 https://www.youtube.com/channel/UC3BoiHHEbhS8gIfeRzPfb7w

Facebook Handle: https://www.facebook.com/poonambachhavblogspot

Instagram Handle: https://www.instagram.com/poonambachhav/

Pinterest Handle : https://in.pinterest.com/poonambachhav/

Twitter Handle: https://twitter.com/poonampagar_B


See you soon with yet another healthy and delicious creation from my Kitchen. Until then Stay safe and eat right !


Happy Cooking !

Happy Eating !


Monday 4 July 2022

Tondali Masale Bhat


Tondali Masale Bhat is a flavorful and aromatic spiced Ivy gourd rice dish from the Maharashtrian Cuisine. Typically served during wedding meals, in Vidarbha and Marathwada regions of Maharashtra, Tondali Bhat is spicy rice preparation. Here i have shared an easy to follow , quick one-pot version which uses homemade Masala (spice blend) . Tondali Masale Bhat is Onion-garlic free, vegan and gluten-free. 


What is Masale Bhat ?

Masale Bhat is a spicy aromatic traditional Maharashtrian rice preparation . It is a one-pot meal with a perfect blend of rice and vegetables with spices. Masale bhat is on the Maharashtrian wedding menu for sure. In today's  version we are using tonadli (Ivy Gourd) as a star ingredient, hence the name of the dish. Whole spices are dry roasted and ground to make the masala (spice blend) for the masale bhat which makes the dish aromatic and flavorful. Tondali Masale Bhat is onion-garlic free which makes it an ideal offering to the deity (Naivedhyam) during festivals and special occasions.

Dietary Notes: Tondali Masale Bhat is

  • Spicy rice dish from Maharashtrian Cuisine
  • Vegetarian one-pot meal
  • Vegan and Gluten-free
  • Onion-garlic free
                         

A little about Maharashtrian Cuisine:

Maharashtrian cuisine is the cuisine of the Marathi people from the Indian state of Maharashtra. We Maharashtrians are big time foodies and take pride in our cultural diversity. Maharashtra can never disappoint you, when it comes to food. From Lip smacking snacks like Vada-Paav, MissalPaav-BhajiKande Pohe, to delectable sweets like Ukadiche ModakPuran-PoliBasundiShrikhand, Maharashtra has a lot to offer to food lovers.

Maharashtrian cuisine comprises of a variety of mild to very spicy tongue tickling dishes. The food is tempting and delicious and makes use of aromatic and flavorful ingredients. Peanuts and sesame seeds are widely used in curries and chutneys.  Garlic and chilies are liberally used in many of the dishes which give a characteristic zesty and spicy taste to the food. Maharashtrian snacks and street food is very popular across India.


Short Video of Tondali Bhat 

              ..


Related Event : Maharashtrian Cuisine @ Shhhhhhh Cooking Secretly Challenge

This Tondali Masale Bhat is featured in our gourmet Facebook group, Shhhhh Cooking Secretly Challenge , where in a group of talented food bloggers share their culinary skills every month depending upon a pre-determined theme. Participating members are divided into pairs and exchange set of secret ingredients among themselves and prepare a dish related to the theme of that particular month using the set of ingredients provided by their partners as key ingredients. The dish is prepared and only the pic of the dish is circulated in the group and other members of the group who are not aware of the secret ingredients have to guess those ingredients, just by looking at the pic of that dish. The correct indredients and the dish is revealed at the end of the month. The theme for June 2022 was proposed by yours truly as Maharashtrian Cuisine . My partner for the theme was Radha Rajgopalan who gave me Black cardamom and Caraway seeds as my secret ingredients and i prepared this flavorful Tondali Bhat using the set of ingredients. In return , I gave her Garbanzo flour and asafoetida and she made a flavorful Garbanzo flour Pithala using that set of ingredients. Do check out her space for many delicious recipes.


Preparation Time: 15 minutes
Cooking Time: 20 minutes
Serves: 4

Ingredients for Masala (spice blend) of Masale Bhat:
  • 2 tablespoon Coriander seeds
  • 1 teaspoon cumin seeds
  • 4-5 black pepper corn
  • 4-5 cloves
  • 1 black cardamom
  • 1 inch cinnamon stick
  • 1/4 cup desiccated coconut / dry grated coconut
  • 2 dried red chilies
  • 1 tablespoon sesame seeds
Ingredients for Tondali Masale Bhat:
  • 1 cup Basmati rice
  • 100 grams Ivy Gourd (Tondali)
  • 2-3 tablespoon oil
  • 1 teaspoon green chili ginger paste
  • 2 tablespoon of masale bhat masala
  • 1/4 teaspoon turmeric powder
  • 1 bay leaf
  • 1/4 teaspoon caraway seeds (Shah Jeera)
  • 1 tablespoon tamarind jaggery chutney
  • Small bunch of fresh coriander leaves
  • Fresh scrapped coconut for garnishing
  • Salt to taste
Method:
  1. Dry roast the spices listed under Masala for masale bhat one by one on low to medium flame for 2-3 minutes. Allow it to cool down completely and then make a coarse powder using grinder jar. Our aromatic and flavorful  spice blend for Masale Bhat is ready. It can be stored for about a month on refrigeration in an air-tight container.
  2. Rinse 1 cup Basmati rice and soak in enough drinking water for 15-20 minutes.
  3. Wash, pat dry and chop the top and bottom part of the ivy gourd and then slice it longitudinally.
  4. Heat oil in a pressure cooker on low to medium flame. Add bay leaf followed by caraway seeds. Once the spices sizzle, tip in the green chili ginger paste and fry for about 30 seconds.
  5. Next, add the sliced ivy gourd and stir-fry for 1-2 minutes.
  6. Now add our rinsed, soaked and drained rice and give a good stir.
  7. Add 2 tablespoon of ready spice blend (masala for masale bhat), turmeric powder and salt to taste. 
  8. Stir fry the rice with spice blend for a minute or so before adding water.
  9. Add 2.5 cups of boiling water and stir it well.
  10. Next, add tamarind and jaggery chutney and finely chopped fresh coriander. 
  11. Stir well and close the lid of the pressure cooker and pressure cook the rice for 2 whistles on medium flame.
  12. Open the lid of the cooker once the pressure has released. Fluff the rice gently with fork.
  13. Garnish with freshly scrapped coconut and coriander leaves. 
  14. Our flavorful and aromatic Tondali Masale Bhat is ready to serve !
  15. Serve it hot with Sol Kadhi or Mattha.


Would love to hear from you !

I hope you would love trying out this healthy aromatic and spicy Tondali Masale Bhat. If you do so, feel free to share your feedback with us in the form of likes and comments in the section below this post.

All your suggestions are more than welcome. If you like my work, and feel that it is worth following, do hit the follow button on the top right corner of this blog. Your appreciation means a lot to me. It gives me the inspiration and motivation to keep doing my work and give my best each time.

If you like my work and want to be updated with new recipes, do follow us on various social media platforms. My social media handles for your kind reference are as follows. 


You Tube Channel English : 

https://www.youtube.com/channel/UCasKW9Cq5khnTS3JnJ43m2A 

You Tube Channel Marathi :

 https://www.youtube.com/channel/UC5lWdtDq45pDz04dJeezw7A

You Tube Channel Hindi :

 https://www.youtube.com/channel/UC3BoiHHEbhS8gIfeRzPfb7w

Facebook Handle: https://www.facebook.com/poonambachhavblogspot

Instagram Handle: https://www.instagram.com/poonambachhav/

Pinterest Handle : https://in.pinterest.com/poonambachhav/

Twitter Handle: https://twitter.com/poonampagar_B


See you soon with yet another healthy and delicious creation from my Kitchen. Until then Stay safe and eat right !


Happy Cooking !

Happy Eating !


Regards

Poonam Bachhav 


Related Post:

Saturday 2 July 2022

Besan Bread Toast


Besan Bread Toast  is a healthy and delicious savory snacks and breakfast recipe. Made with healthy goodness of chickpea flour and loads of veggies, this toast is easy to make and ready under 20 minutes. I have used whole wheat (Atta) bread to make this toast which makes it guilt-free. This besan bread toast is made on a tawa or skillet and does not require grill or sandwich maker. You can pack these besan bread toast in kids lunch box or serve them as breakfast or tea-time snacks. 


Schools and Colleges have started working offline after a really long time and while kids, parents and teachers, all are super excited, mommies are busy figuring out what to pack in lunch box. I am here with a super easy and quick lunch box recipe that is both healthy and delicious. Besan Bread Toast  or besan tawa toast. You might like checking out Priya's  Pressure Cooker Sweet corn Pulao which is also a quic, healthy and delightful lunch box option.


Short Video for Besan Bread Toast


What goes into my version of Besan Bread Toast / The ingredients:

  • Besan / Chickpea flour : Makes the toast protein rich and provides a base for the toast and holds the veggie toppings very well. 
  • Bread: I have used 100% Atta (whole wheat bread) to make it healthy. You may use multigrain bread as well.
  • Veggies : I have used onions, carrots, bell pepper, tomatoes and coriander. You may use veggies of your choice.
  • Spices : This toast uses very little basic spices like turmeric powder, red chili powder, carom seeds, black pepper corn. I have not used green chilies as i made these toast for my son.
  • Cheese: I have grated cheese on the ready toast and sprinkled little oregano and chili flakes to make it all the more delightful.
  • Oil: Very little oil is required to shallow fry the toast.
Ingredients for Besan Bread Toast:
  • 1 Cup Chickpea Flour / Besan
  • 4 bread slices
  • 1/4 teaspoon turmeric powder
  • 1 teaspoon red chili powder
  • 1 teaspoon carom seeds (ajwain)
  • 1 teaspoon black pepper powder
  • 1 onion finely chopped
  • 1 tomato finely chopped
  • 1 bell pepper deseeded and finely chopped
  • 1 small carrot , grated
  • 1-2 tablespoon oil
  • 1/4 cup grated cheese (optional
  • Chili flakes and oregano for garnishing
Method:
  1. In a mixing bowl, sift Besan. 
  2. Add turmeric powder, red chili powder, salt and carom seeds to it. 
  3. Adding little water at a time make a lump free batter of it.
  4. In another mixing bowl add all the chopped veggies. Season them with salt and black pepper .
  5. Dip 1 bread slice to the prepared chickpea flour batter and allow it to coat from boat sides.
  6. Immediately transfer it to greased and heated skillet, as the bread may turn soggy and tear, if you keep it in the batter for longer time.
  7. Add 1-2 tsp of veggies on the besan coated bread slice and spread the veggies evenly on the slice. Press it gently, so that the veggies adhere to the slice and does not come out while flipping the toast.
  8. Drizzle little oil from the sides of the bread slice and cover cook it for a minute or so on low to medium flame.
  9. Gently flip the toast and cook the other side as well .
  10. Make all the besan bread toast similarly.
  11. Cut the toast into desired shape and size. 
  12. Garnish it with grated cheese, organo and chili flakes if you wish to.
  13. The toast tastes great on its own, though you can serve it with ketchup or dip of your choice.


Dietary Notes: The Besan Bread Toast is

  • Vegetarian snack
  • Healthy lunch box option for kids
  • Vegan, if you skip the cheese
  • Made with 100 % Atta (whole wheat bread)
  • Quick and easy to make
  • Makes a delicious finger food for toddlers


Would love to hear from you !

I hope you would love trying out this healthy and delicious Besan Bread Toast. If you do so, feel free to share your feedback with us in the form of likes and comments in the section below this post.

All your suggestions are more than welcome. If you like my work, and feel that it is worth following, do hit the follow button on the top right corner of this blog. Your appreciation means a lot to me. It gives me the inspiration and motivation to keep doing my work and give my best each time.

If you like my work and want to be updated with new recipes, do follow us on various social media platforms. My social media handles for your kind reference are as follows. 


You Tube Channel English : 

https://www.youtube.com/channel/UCasKW9Cq5khnTS3JnJ43m2A 

You Tube Channel Marathi : 

https://www.youtube.com/channel/UC5lWdtDq45pDz04dJeezw7A

You Tube Channel Hindi :

 https://www.youtube.com/channel/UC3BoiHHEbhS8gIfeRzPfb7w

Facebook Handle: https://www.facebook.com/poonambachhavblogspot

Instagram Handle: https://www.instagram.com/poonambachhav/

Pinterest Handle : https://in.pinterest.com/poonambachhav/

Twitter Handle: https://twitter.com/poonampagar_B


See you soon with yet another healthy and delicious creation from my Kitchen. Until then Stay safe and eat right !


Happy Cooking !

Happy Eating !


Regards

Poonam Bachhav 


Related Posts: For more Kids Lunch Box recipes, do check out the following


Tuesday 21 June 2022

Jowar Idli / No-Rice Idli Recipe


Jowar idli is a healthy diabetic-friendly idly version that is made using Sorghum / Jowar. This no-rice idly is made with skinned and split black gram and jowar flour. The Jowar idli batter is fermented to make soft fluffy Jowar idlis. Jowar idlis are light to digest and can be served at breakfast or lunch or packed in school lunch box. You can pair it with coconut chutney or Sambar. 


What goes into Jowar Idli ? / The Ingredients

Jowar/Sorghum : The first obvious ingredient of this idli is Sorghum / Jowar flour. Use fresh flour to make this idli for best results. We are replacing rice with sorghum flour in this idli recipe.

Black Gram: Skinned and split black gram is used as in regular idlis.

Fenugreek Seeds : Methi dana / Fenu greek seeds are used in small quantity.

Salt to Taste


How to make Jowar idli ?

Step I : Soaking : Black gram and fenugreek seeds are washed and soaked in water for about 4 hours.
Step II : Grinding : The soaked dal is then transferred to grinder jar and a smooth paste is being made.
Step III :Fermentation : Jowar flour is added to the urad dal paste and a batter is prepared which is allowed to ferment for 6-8 hours
Step IV : Steaming : The fermented batter is then added to greased idli moulds and steamed for 20 minutes.


Dietary Notes: This Jowar idli is
  • No-Rice idli
  • Requires fermentation
  • Is Diabetic Friendly
  • Weight Loss food
  • Great finger-food for babies
  • Healthy Breakfast recipe
  • Can be packed in lunch-box


Ingredients: 1 cup = 240 ml
  • 1 cup urad dal
  • 1 teaspoon fenugreek seeds
  • 2.5 cups Sorghum / Jowar flour
  • Salt to taste
Method:
  1. Split and skinned black gram is washed thoroughly along with fenugreek seeds and soaked in enough water for around 4 hours.
  2. The soaked dal is then transferred to grinder jar and a smooth lump-free  paste is made of it.
  3. Jowar flour is added to the black gram paste along with water as required to make a idli batter.
  4. The batter is covered and kept undisturbed in dark place for around 6-8 hours for fermentation.
  5. Salt is added to the fermented batter and then poured into idli moulds and steamed for around 20 minutes.
  6. Soft fluffy and spongy idlis are ready to be served.
  7. You can serve the idlis with coconut chutney or Sambar
                     

Would love to hear from you !

I hope you would love trying out this healthy and delicious Jowar Idli. If you do so, feel free to share your feedback with us in the form of likes and comments in the section below this post.

All your suggestions are more than welcome. If you like my work, and feel that it is worth following, do hit the follow button on the top right corner of this blog. Your appreciation means a lot to me. It gives me the inspiration and motivation to keep doing my work and give my best each time.

If you like my work and want to be updated with new recipes, do follow us on various social media platforms. My social media handles for your kind reference are as follows. 


You Tube Channel English : 

https://www.youtube.com/channel/UCasKW9Cq5khnTS3JnJ43m2A 

You Tube Channel Marathi :

 https://www.youtube.com/channel/UC5lWdtDq45pDz04dJeezw7A

You Tube Channel Hindi : 

https://www.youtube.com/channel/UC3BoiHHEbhS8gIfeRzPfb7w

Facebook Handle: https://www.facebook.com/poonambachhavblogspot

Instagram Handle: https://www.instagram.com/poonambachhav/

Pinterest Handle : https://in.pinterest.com/poonambachhav/

Twitter Handle: https://twitter.com/poonampagar_B


See you soon with yet another healthy and delicious creation from my Kitchen. Until then Stay safe and eat right !


Happy Cooking !

Happy Eating !


Regards

Poonam Bachhav 


Related Posts: 
  • Ragi Dosa                               


Saturday 4 June 2022

Raw Mango Dal Recipe


Mango Dal is a flavorful lentil curry from the South Indian Cuisine that is made using raw mango and some basic Indian spices. Here, i have used mixed lentils to prepare the dal. A protein rich tangy lentil curry that can be paired with steamed rice or flat bread like chapati or paratha. The recipe is onion-garlic free , simple and easy to follow.

Summer's in India are incomplete without relishing on mangoes. Both raw and ripe mangoes are used in various culinary preparations across Indian states apart from enjoying it whole as a fruit. Raw mango has many nutritional benefits and can be used in a wide range of foods like beverages, rice dishes, chutneys, pickles , jams, relish etc. 


What goes into this Raw Mango Dal Recipe ? The Ingredients:

Lentils: Here, i have used a mix of pigeon pea, green gram and red lentil to make this mango dal.

Raw Mango : Adds a lovely tangy flavor to the dal.

Spices : Dry red chilies, mustard seeds, cumin seeds, asafoetida, green chilies, turmeric powder and ginger are used in making this mango dal.

Ghee: I have tempered the dal with ghee, you may use oil instead if you wish.

Herbs: I have used dried fenu greek leaves, you may use coriander leaves, curry leaves instead.

Jaggery : I have used 1 teaspoon jaggery which balances the flavors of the dal very well.

Salt to taste. 


Related Event : Mango Mania @Shhhhhh Cooking Secretly Challenge

For the month of May, we food bloggers of Shhhhhh cooking Secretly challenge are celebrating Mango season with Mango Mania theme suggested by Mayuri Patel di. She proposed  that we could cook My dish with raw or ripe mangoes for the theme. You can check out her flavorful Fajeto - Gujarati Mango Kadhi.  My partner for the theme was Kalyani who blogs at Sizzlingtastebuds. She gave me masoor dal amd ginger as my 2 secret ingredients  and I made this flavorful raw mango dal using it. In return, I gave her muskmelon snd walnuts and she made a delightful and refreshing Sugarfree Mango Yogurt Parfait using her set of ingredients. 

Ingredients: 

  • 1/2 cup pigeon pea / Arhar ki dal / Tur Dal
  • 1/2 raw mango, peeled and stoned removed
  • 2 tablespoon Red lentils / Masoor ki dal
  • 2 tablespoon Green gram / Moong Dal
  • 2 tablespoon ghee
  • 1/4 teaspoon mustard seeds
  • 1/4 teaspoon cumin seeds
  • Pinch of Asafoetida
  • 1/4 teaspoon turmeric powder
  • 2 dried green chilies
  • 1/2 inch ginger, grated
  • 1 sprig curry leaves
  • 2 green chilies, chopped
  • 1 tablespoon kasuri methi / dried Fenu greek leaves
  • Salt to taste
Method:
  1. Wash the lentils thoroughly and then soakin enough water for 1/2 an hour. This soaking step is optional, but i would recommend it as it saves, cooking time and ensures, the dal cooks well.
  2. Transfer the soaked dal to a pressure cooker with a pinch of asafoetida, turmeric powder and washed and peeled raw mango pieces.
  3. Put on the lid and pressure cook the dal for 2 whistles and then simmer for 5 minutes.
  4. Open the lid, once the pressure has come down.
  5. You will notice the raw mango pieces are mushy and well cooked.
  6. Now mash the dal well, add some water if required. Set aside.
  7. Heat sauce pan on low to medium flame. Add ghee to it. Once the ghee is hot, add mustard seeds.
  8. Once the seeds splutter, add cumin seeds followed by asafoetida, tureric, broken red chilies, green chilles, grated ginger and saute well on low flame. 
  9. Now add the mashed cooked dal to it.
  10. Add 1 cup water or more depending upon the consistency of dal you wish to have.
  11. Add salt to taste and jaggery if using. Give it a good stir.
  12. Allow the dal to cook for another 5 minutes on medium flame. 
  13. At the end add kasuri methi and put off the flame.
  14. If you wish, you may reserve little tempering and add to the dal after serving it to make it all the more appealing and flavorful.
  15. Serve the delicious raw mango dal with rice or paratha and enjoy with your loved ones !


Would love to hear from you !

I hope you would love trying out this healthy and delicious Raw Mango Dal. If you do so, feel free to share your feedback with us in the form of likes and comments in the section below this post.

All your suggestions are more than welcome. If you like my work, and feel that it is worth following, do hit the follow button on the top right corner of this blog. Your appreciation means a lot to me. It gives me the inspiration and motivation to keep doing my work and give my best each time.

If you like my work and want to be updated with new recipes, do follow us on various social media platforms. My social media handles for your kind reference are as follows. 


You Tube Channel English : 

https://www.youtube.com/channel/UCasKW9Cq5khnTS3JnJ43m2A 

You Tube Channel Marathi : 

https://www.youtube.com/channel/UC5lWdtDq45pDz04dJeezw7A

You Tube Channel Hindi : 

https://www.youtube.com/channel/UC3BoiHHEbhS8gIfeRzPfb7w

Facebook Handle: https://www.facebook.com/poonambachhavblogspot

Instagram Handle: https://www.instagram.com/poonambachhav/

Pinterest Handle : https://in.pinterest.com/poonambachhav/

Twitter Handle: https://twitter.com/poonampagar_B


See you soon with yet another healthy and delicious creation from my Kitchen. Until then Stay safe and eat right !


Happy Cooking !

Happy Eating !


Regard

Poonam Bachhav 


Related Posts:


poonambachhav.blogspot.com