/body> >

Thursday 31 March 2016

Vegetable Kuzhi Paniyaram Recipe


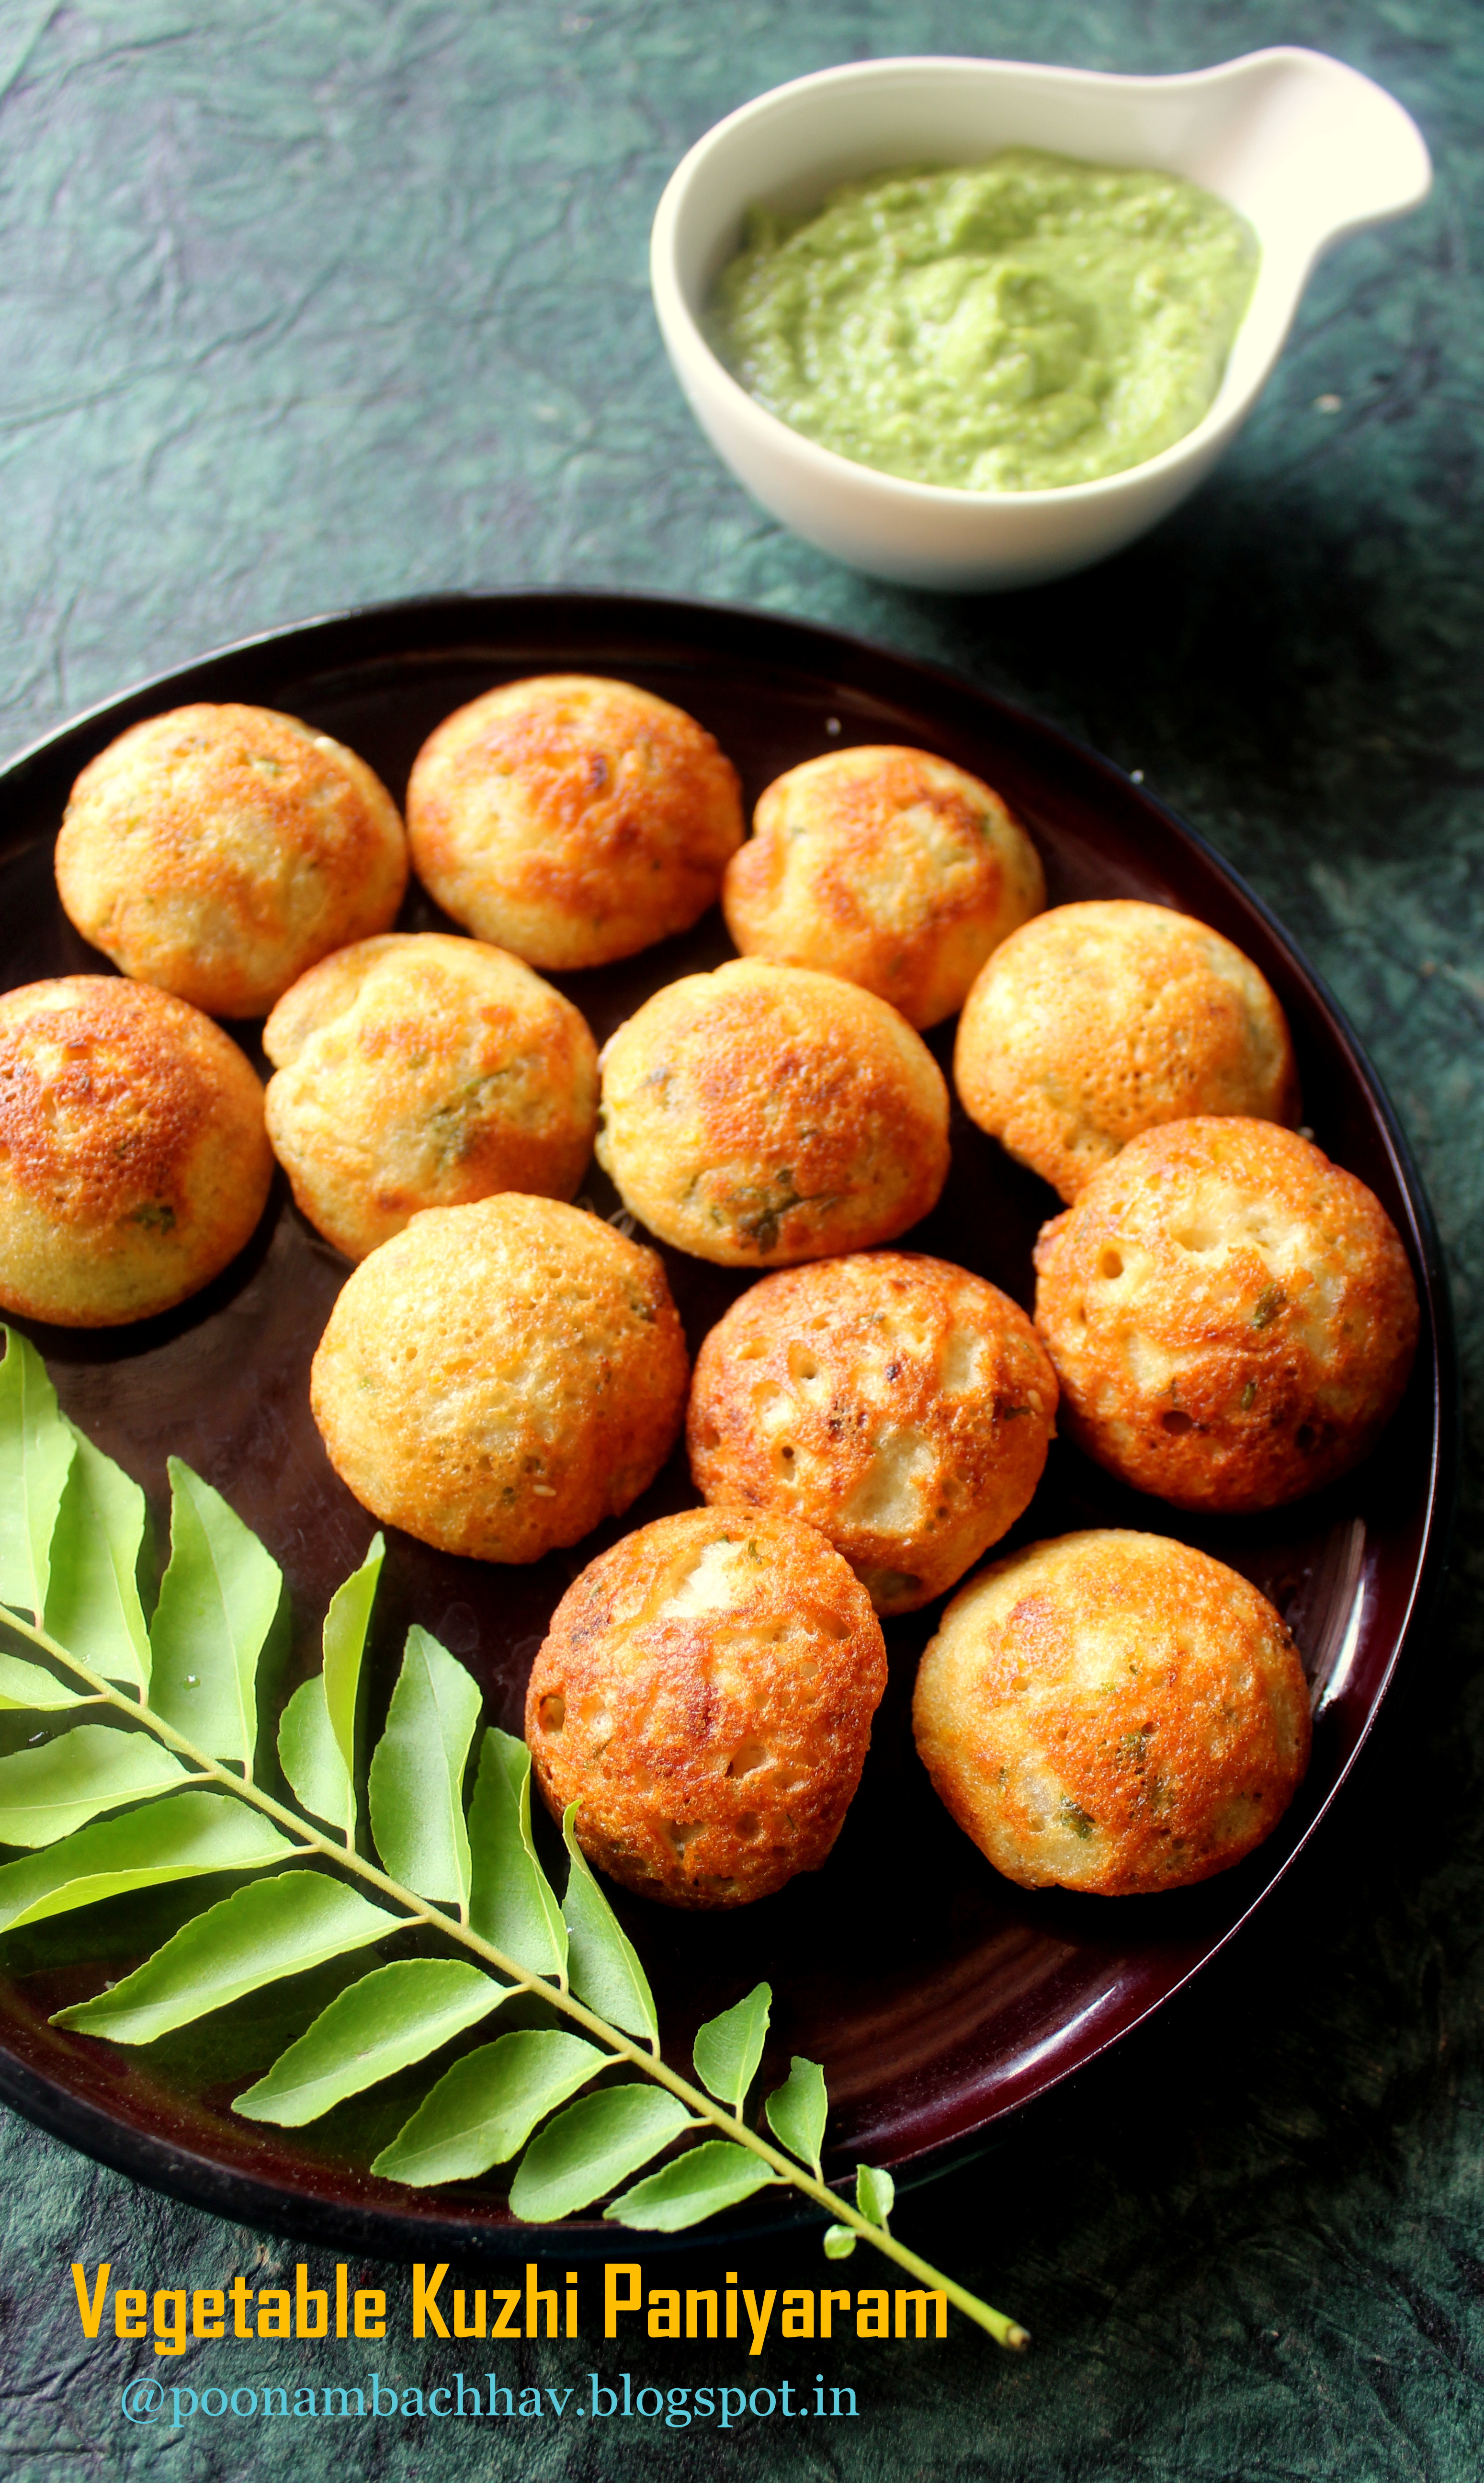
Kuzhi Paniyaram, a ball-shaped savory dumpling made from fermented rice and lentil batter is a popular South Indian breakfast dish. It is generally made using the leftover idly/dosa batter in a cast iron paniyaram pan. I am sharing a recipe for healthy and delicious vegetable kuzhi paniyaram where the batter is made from scratch from soaked and ground rice, urad dal, and chana dal. The batter can be used directly or allowed to ferment for 5-6 hours. To make the dish more wholesome, I add vegetables like carrot, onion, and coriander to the fermented batter before it is cooked in paniyaram or the appe pan. Serve Kuzhi Paniyaram along with coconut chutney for breakfast or as a tea time snack. The recipe is vegan and gluten-free.
                                                  

Love for Kuzhi Paniyaram

To be very frank I have been enjoying this dish since my childhood and we call it appe in Maharashtra. As a child, I always thought that it was a Maharashtrian dish as we made it quite often. My mom never made them using leftover idly batter, she always made the batter for scratch. I am sharing the very same recipe which we have been following from ages. The only change I have made is that I add veggies to it to make it more wholesome. My family just loves to have kuzhi paniyaram for breakfast and I make sure I make it once every week. My son takes it happily in his lunch box. This dish is ideal for kids parties and get-togethers as a healthy appetizer. 

Paniyaram / Appe Pan

To make Kuzi paniyaram we require a paniyaram pan. It is also called as appe pan or Aebleskiver pan. It is a cast-iron pan with circular cavities. Few drops of oil are added to each cavity before pouring the batter. The pan is covered with a lid for the paniyaram to cook. Once it turns crisp and golden brown from beneath the paniyaram is flipped and the other side is being cooked, now without being covered by the lid. Paniyaram pan not only allows one to enjoy the deep-fried snack and finger food with just a few drops of oil but also makes the dish loop appealing because of the shape it lends to the snack. Nowadays non-stick paniyaram pans with a glass lid are available easily in Indian marts and online as well. I make both sweet and savory snack using this paniyaram pan like Banana Oats AppamBeetroot Corn Fritters.


Variations

There are many variations to this vegetable kuzhi paniyaram. As mentioned above, ideally it is made from the leftover idly/dosa batter which has turned a bit sour. Another variation is that the batter is first oil tempered with mustard seeds, curry leaves, and sauteed veggies and then added to the cavities of the paniyaram pan and then cooked. Paniyaram is also made using rava(semolina) and rice flour. I will share that recipe also soon.


What goes into my Vegetable Kuzhi Paniyaram?

To make the batter for Kuzhi Paniyaram from scratch, we need rice, chana dal( Bengal gram) and urad dal (black gram). The ratio of rice to lentils is 1:1. So for 1 cup rice, we will need 1/2 cup urad dal and 1/2 cup of chana dal. Next, we require veggies like onion, carrot, ginger, and green chilies. Fresh coriander is also used used apartb from cumin seeds and salt to flavor the paniyaram. Little oil is required to cook the paniyaram. Both lentils are rinsed and soaked together whereas the rice is soaked in a separate container for 6-8 hours. The lentils and rice are drained and ground separately with cumin seeds, ginger, green chilies, and salt. The ground rice and lentil batter is then mixed together, covered, and allowed to ferment for 4-5 hours. The batter can directly be used for making paniyaram though. Chopped or grated veggies are then added to the batter and then it is poured in greased cavities of the paniyaram pan and allowed to cook from both sides until it turns crisp and golden brown from both sides. The leftover fermented batter can be stored in a refrigerator for 1-2 days but before adding the veggies to it. 

Related Event:

                                                                 Foodies_RedoingOldPost

This is an old post that i had published in 2016 during my initial blogging days. I have updated this post today with the new images and written content of this recipe. I have many such old posts where the photography is dull and the recipe is not up to the mark. Such posts need to be updated with new pictures and written content. Thanks to Renu, my dear friend, and a fellow blogger who came up with a Facebook group, Foodies_Redoing Old Posts as an initiative, where we bloggers can update our old posts with either new pictures or written content or both every two weeks. This is my 18th entry into this event (12thJune 2020). the pic below is my old pic of vegetable Kuzhi Paniyaram. meanwhile, do check out Renu's blog for some delicious recipes like  Rajasthani Paush Bada, an onion-garlic free crunchy snack using lentils and spinach which i want to try out in a paniyaram pan.


Preparation Time: 12 hours (including time required for fermentation)
Cooking Time: 6-8 minutes per batch
Serves: around 2 dozen paniyaram

Ingredients: Measurements used 1 cup = 240 ml
  • 1 cup Rice
  • 1/2 cup skinned and split Black gram ( Dhuli Urad Dal )
  • 1/2 cup Bengal gram ( Chana Dal )
  • 1/2 inch piece of Ginger
  • 2 green Chilies
  • 1 tsp Jeera ( Cumin)
  • 1 Onion finely chopped
  • 1 large Carrot, grated
  • 2-3 tbsp of finely chopped fresh Coriander leaves
  • Salt to taste
  • 2-3 tbsp of Oil
Method:
  1. Wash and rinse the rice. Mix the Urad dal and Chana dal, wash and rinse them also. Soak the rice and dals in enough water separately overnight. 
                               

   2.  Next day, do not rinse the rice or dal, just drain it and reserve the water in which it was soaked. We will be using the same water while grinding. Now grind the rice separately using a grinder. Add water little by little and grind to a thick batter. Similarly, grind the dals together in a grinder. Add ginger, cumin seeds, and green chilies to the soaked dal while grinding. In a big vessel combine both the ground rice and dal batter along with salt with your hand or spoon. ( You can also add salt while grinding the batter) Cover and allow to ferment for at least 4-5 hours. 


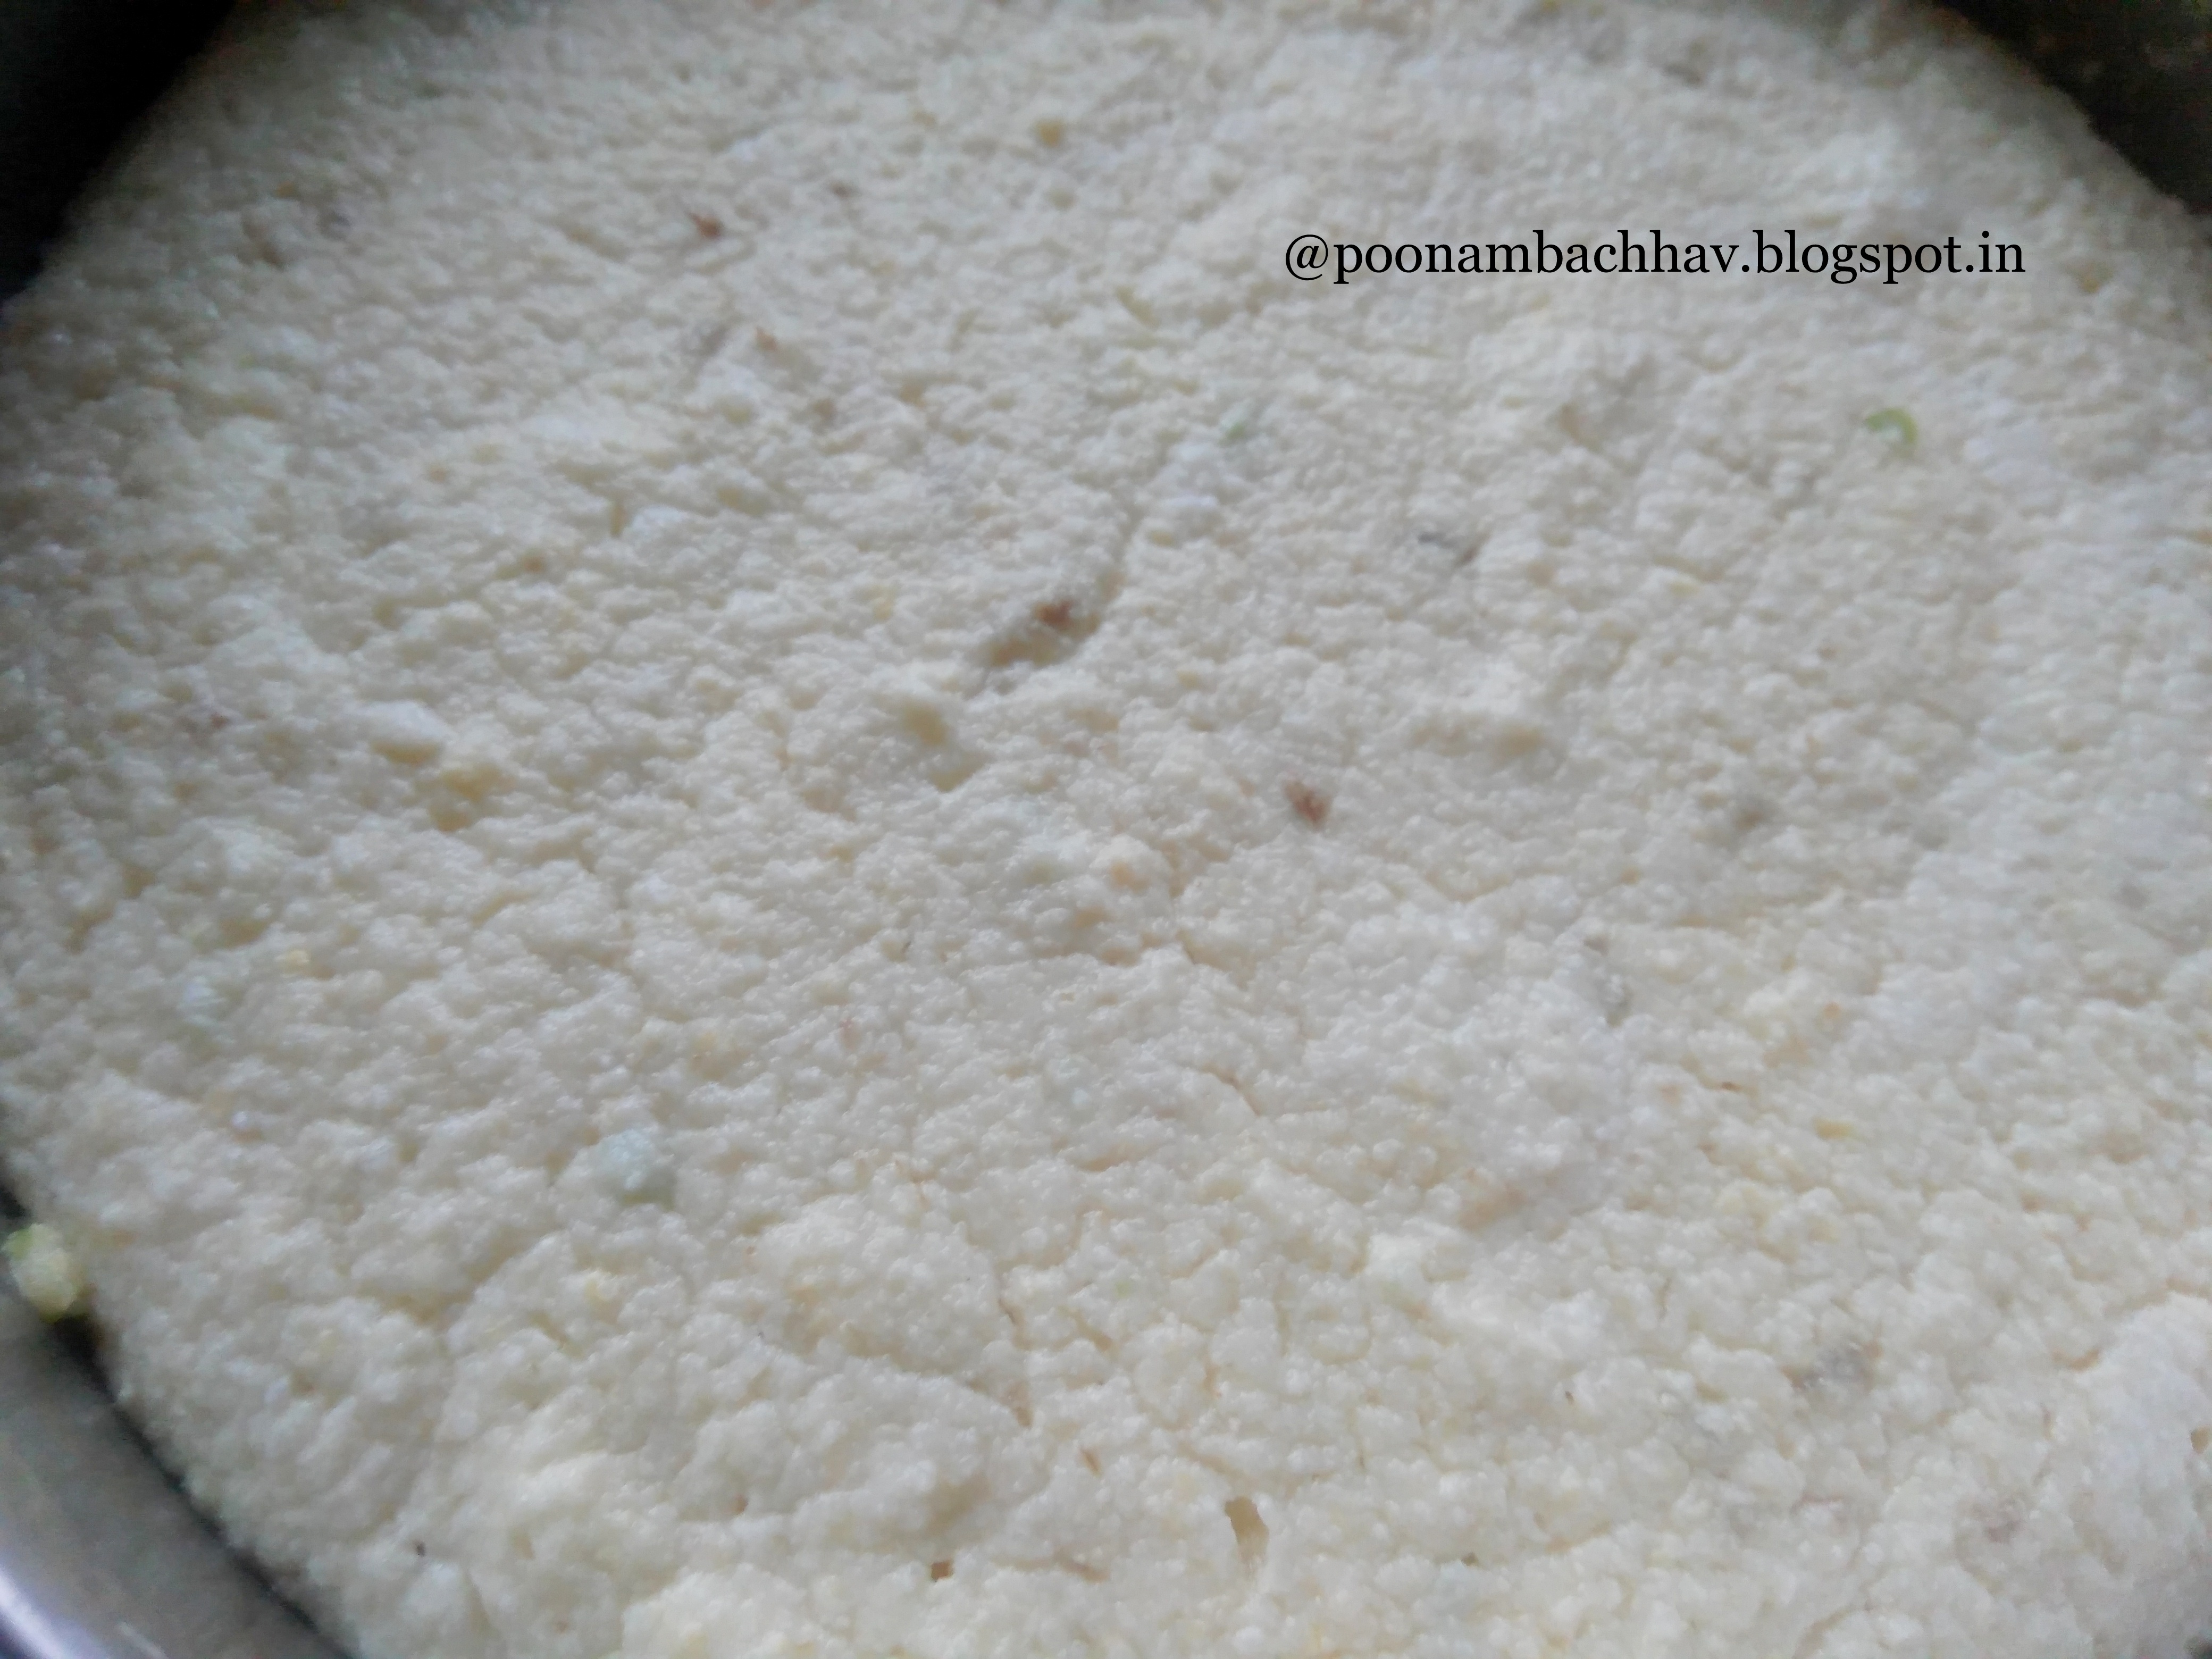
 3. You can make Paniyaram out of this fermented batter, but adding veggies make it more healthier. You may add sweet corn, green peas, finely chopped carrots, and coriander to the batter. If you want, you may also saute the veggies first in little oil and then add them to the fermented batter. Mix the veggies to the batter nicely with a spoon.


  4. Add 1-2 drops of oil in each well of the paniyaram pan and heat it over medium flame. Fill 3/4 of each cavity with the batter ( as it will rise little while cooking). Cover the pan and let the Paniyaram cook on low to medium flame for 2-3 minutes or until the lower side is golden brown, flip each of paniyaram with the help of a wooden stick. Cook for 1-2 minutes again but without the lid this time. I have used very little oil, as my paniyaram pan is nonstick. If using the traditional iron casts, you may need at least 1/4 tsp of oil in each cavity. 


  5. Remove the Paniyaram and keep in a bowl. Serve hot with chutney of your choice and enjoy these healthy treats with your loved ones!


Recipe Notes:
  • Kuzhi Paniyaram is made from the leftover idly/dosa batter which has turned a bit sour. Here, i am sharing the recipe to make the batter from scratch.
  • I have directly added the veggies to the fermented batter, however, you may oil temper the batter with mustard seeds, curry leaves, and sauteed veggies and then added to the cavities of the paniyaram pan. 
  • The fermented batter( without adding the veggies) can be stored in a refrigerator for 1-2 days. So i would suggest adding veggies to the batter in batches.
  • Vegetable kuzhi paniyaram can be served at breakfast or as a tea time snack with any chutney of your choice. We personally love it with Coconut chutney
  • The kuzhi paniyaram taste best when served hot. However, leftovers can be warmed either in a microwave oven or in a heated paniyaram pan.
I hope a few of you would love to try out this recipe. If you do so, feel free to share your feedback with us in the form of likes and comments in the comment section below this post. All your suggestions are also more than welcome. If you like my work and feel it is worth following, do hit the follow button at the top right corner of this blog. Your appreciation means a lot to me. For more recipes and new updates follow us on social media.

Related Posts:


Monday 28 March 2016

Strawberry Raita Recipe


If you are looking for a quick yet classy yogurt dish, then you should try out this Strawberry Raita recipe. A delicious ,cool and refreshing yogurt dip that can be made in a jiffy. Sweet and tangy in tasty , Strawberry raita perfectly balances the spiciness of curries and Biryanis of Indian meal. Can be served as a side dish with any main course or with any paratha or rice dish of your choice. I relish it as it is as a mid time snacks :)

Ingredients:
  • 1 cup thick Curd ( i have used fresh homemade curd)
  • 1/2 cup Strawberries diced
  • 1-2 tbsp of finely chopped fresh Coriander
  • 2-3 tsp of Sugar or as per need
  • 1 tsp roasted Cumin powder ( Jeera powder)
  • Salt to taste
Method:
  1. Wash the Strawberries thoroughly in running water. Pat dry, hull( process of removing the top green part of Strawberry is called hulling) and make thin slices of 1 strawberry and chop the remaining  into small chunks. We will be using the slices for garnishing.


  2. Take thick curd in a mixing bowl. Whisk it until smooth with a spoon or a whisker. Add Sugar , Salt and roasted Cumin powder and mix well.


  3. Now add the chopped Strawberry chunks into the whisked and seasoned curd followed by the finely chopped coriander leaves. Mix well. Do a taste test and add salt or sugar accordingly. Within few minutes, the Strawberry will impart nice baby pink color to the Raita, making it all the more appealing. 


  4. Garnish the Raita with reserved Strawberry slices and refrigerate until serving time. Serve this delicious raita as a side dish with any main course or with Paratha or rice dish and enjoy with your loved ones !


   Hope you all would give this flavorful raita a try and give me your valuable feedback through comments :)

Tips:
  • Whisk the yogurt or curd very well.
  • The curd used should not be too sour.
  • You may add freshly ground black pepper powder or finely chopped green chilies also to this raita to give it a spicy kick.
  • You may replace the salt with black salt in the raita.

For more Strawberry dishes, do check my posts on


Tuesday 22 March 2016

Eggless Butterless Carrot Muffins


Before i start, let me thank all of you for your wonderful wishes on my first blog anniversary. Here's a small treat for all of you - Carrot Muffins ! These Carrot muffins are eggless , butterless and to make it a healthier affair , i have replaced the all purpose flour with whole wheat flour and added chopped almonds to them. I had replaced eggs with flax seeds in my Moist Carrot Cake Recipe , this time i used curd as an egg replacer. 

The muffins turned out soft and moist and taste was awesome. The recipe is quick , easy to follow and requires minimal ingredients that are easily available in a kitchen pantry. So lets quickly have a look at the ingredients and method.

                           
Ingredients:
  • 1 1/4 cup whole wheat flour
  • 1 cup curd
  • 3/4 cup grated Carrots
  • 3/4 cup granulated Sugar
  • 1/4 cup Oil ( i have used Sunflower)
  • 3 tbsp chopped Almonds
  • 1 tsp Vanilla extract
  • 1/2 tsp baking powder
  • 1/2 tsp baking soda
  • Pinch of salt
Method:
  1. Wash, peel and grate the carrot and keep aside. Grease or line the muffin tray . Preheat the oven at 180 degree Celsius for 10 minutes. 

 2. Sift whole wheat flour , baking soda , baking powder and salt together. 


  3.   In a bowl take curd and add sugar to it. Whisk until the sugar dissolves. To it add oil and mix well.


4.  Next add the sifted dry ingredients little by little too the wet ingredients and gently fold. Add grated Carrot to this batter and mix lightly. Do not over beat.


 5. Mix the chopped Almonds with some dry flour and add it to the batter. In the end add the Vanilla extract. Give it a quick stir.


  6.  Fill in the muffin liners to 3/4 max. Tap the muffin tray gently 2-3 times to remove the trapped air bubbles. 


 7. Bake the muffins in the preheated oven for 18-20 minutes or until the tester toothpick comes out clean . If tooth pick is sticky , bake for another 2-3 minutes. Once done , carefully remove the muffins and allow them to cool on the wire rack.


  8. Enjoy the soft and moist Carrot cupcakes with your loved ones !


  For similar recipes , do check my posts on ,


Sunday 20 March 2016

Happy 1st Anniversary to my Blog !


Hurray !! Annapurna has turned 1 today.  It was this day , one year ago ( i remember it was Gudi Padwa, an auspicious day in Hindu Calendar and a New Year day to us Maharashtrians ) when i started my journey as a blogger. A Microbiologist by profession , had never thought i will blog some day. No doubt cooking is, and was my passion since childhood and i had grown up seeing my mom (Mrs. Mangala Pagar) cook variety of authentic dishes . She remains to be my true inspiration in cooking.

Before summarizing my beautiful journey of 1 year in blogging, i would like to thank my buddies Gulshan , Seema and Kajal whom i owe my blog. I would not have been here today, writing this post if these girlies would not have noticed my potential and motivated me to step out of my comfort zone and pen my recipes and cooking experiences. Really blessed to have such kind hearts around me :)

1 year back , my journey began with very little confidence, a more of fear and hesitation. But with all your support and  motivation , i took baby steps and tried to overcome my fear and today i feel that blogging has become a part of my life. I am enjoying it thoroughly . As a blogger , i not only have a platform to share with you my experiences , but i also get to learn and experiment many new dishes and try different cuisines . It is not only the recipe i share here, but also i am able to pen the priceless memories associated  with that particular dish. In this one year, i feel i have overcome my fear of baking and now i enjoy baking breads and cakes for my Son.

I also owe my blog to all my wonderful readers , to my fellow bloggers and to my friends for having faith in me, for continuously inspiring me, for reading my long posts , for appreciating my work through likes , motivating me by trying my recipes and giving me valuable feedbacks through comments. I am also blessed with a very supportive and encouraging family, who gave me the liberty to experiment my trial recipes on them and who always stood behind me as strong pillars . There are many more of you , whom i am not be able to mention here  in this small post, who have helped me to be where i am today . My heartfelt thanks to all of you !

Today Annapurna records , 162 recipes posts and 94131 page views to its blog with all your love and support.  Hoping to see all of you and many more to be in my journey ahead :)


Saturday 19 March 2016

Raw Mango Chutney / Kairichi Dal


Kairi in Marathi means Raw Mango and this chutney is prepared using soaked Chana dal , hence the name. This raw Mango Chutney is also called Ambe dal or vatli dal and is very popular spring delicacy from Maharashtra.

Kairichi dal is also associated with the Chaitra Gauri Haldi Kunku - a social gathering for women in Maharashtra . Chaitra is the first month of Hindu Calendar and Gudhi Padwa the first day of the year for Maharashtrians. On the third day ie Tritiya of Chaitra month , Goddess Parvati also known as Gauri is worshiped by married women and they invite other married women and girls for Haldi Kunku and felicitate them with Haldi Kumkum, a blouse piece and Coconut. Kairichi Dal and Kairi Panha are fixed menu for this Haldi Kumkum event.

Kairichi Dal is a very quick yet delicious preparation. A onion garlic free recipe which can be had as it is or as an accompaniment with the Dal chawal, chapati and subji. It can also served with Upma.

Watch how to make Kairi Dal / Ambe Dal


Ingredients:
  • 1 Cup Chana Dal
  • 1/4 cup grated Kairi / Raw Mango
  • 1/4 cup fresh scrapped Coconut
  • 1-2 green Chilies
  • 2 tsp Sugar
  • 1/4 cup finely chopped fresh Coriander
  • 1/4 tsp Hing / Asafoetida
  • 1/4 tsp Haldi / Turmeric
  • 1/4 tsp Mustard seeds
  • 1 tbsp Oil
  • Salt to taste
Method:
  1. Soak the Chana Dal for at least 4 hours. Drain the dal completely and grind it coarsely .

   2. In a bowl , to this coarsely ground Chana dal , add grated raw mango. My raw mango was not that sour so i added 1/4 cup. If it is sour 3 tbsp should be good enough.


  3. Add fresh scrapped Coconut, finely chopped Coriander leaves, crushed green chilly , Salt, Sugar and Hing and mix it properly.


  4. Heat up 1 tbsp Oil a small kadhai and add mustard seeds to it. Once the seeds crackle , put off the flame and add Turmeric powder. Let this tempering cool down at room temperature and pour this over the raw mango , dal preparation. Mix and check for seasoning , and adjust accordingly. 


  5. Serve this tangy tasty raw mango chutney and enjoy this spring delicacy !


  I hope you would not miss to give this chutney a try, this spring. Do not forget to give your valuable feed back.

For more raw mango preparation, do check my posts on


poonambachhav.blogspot.com