
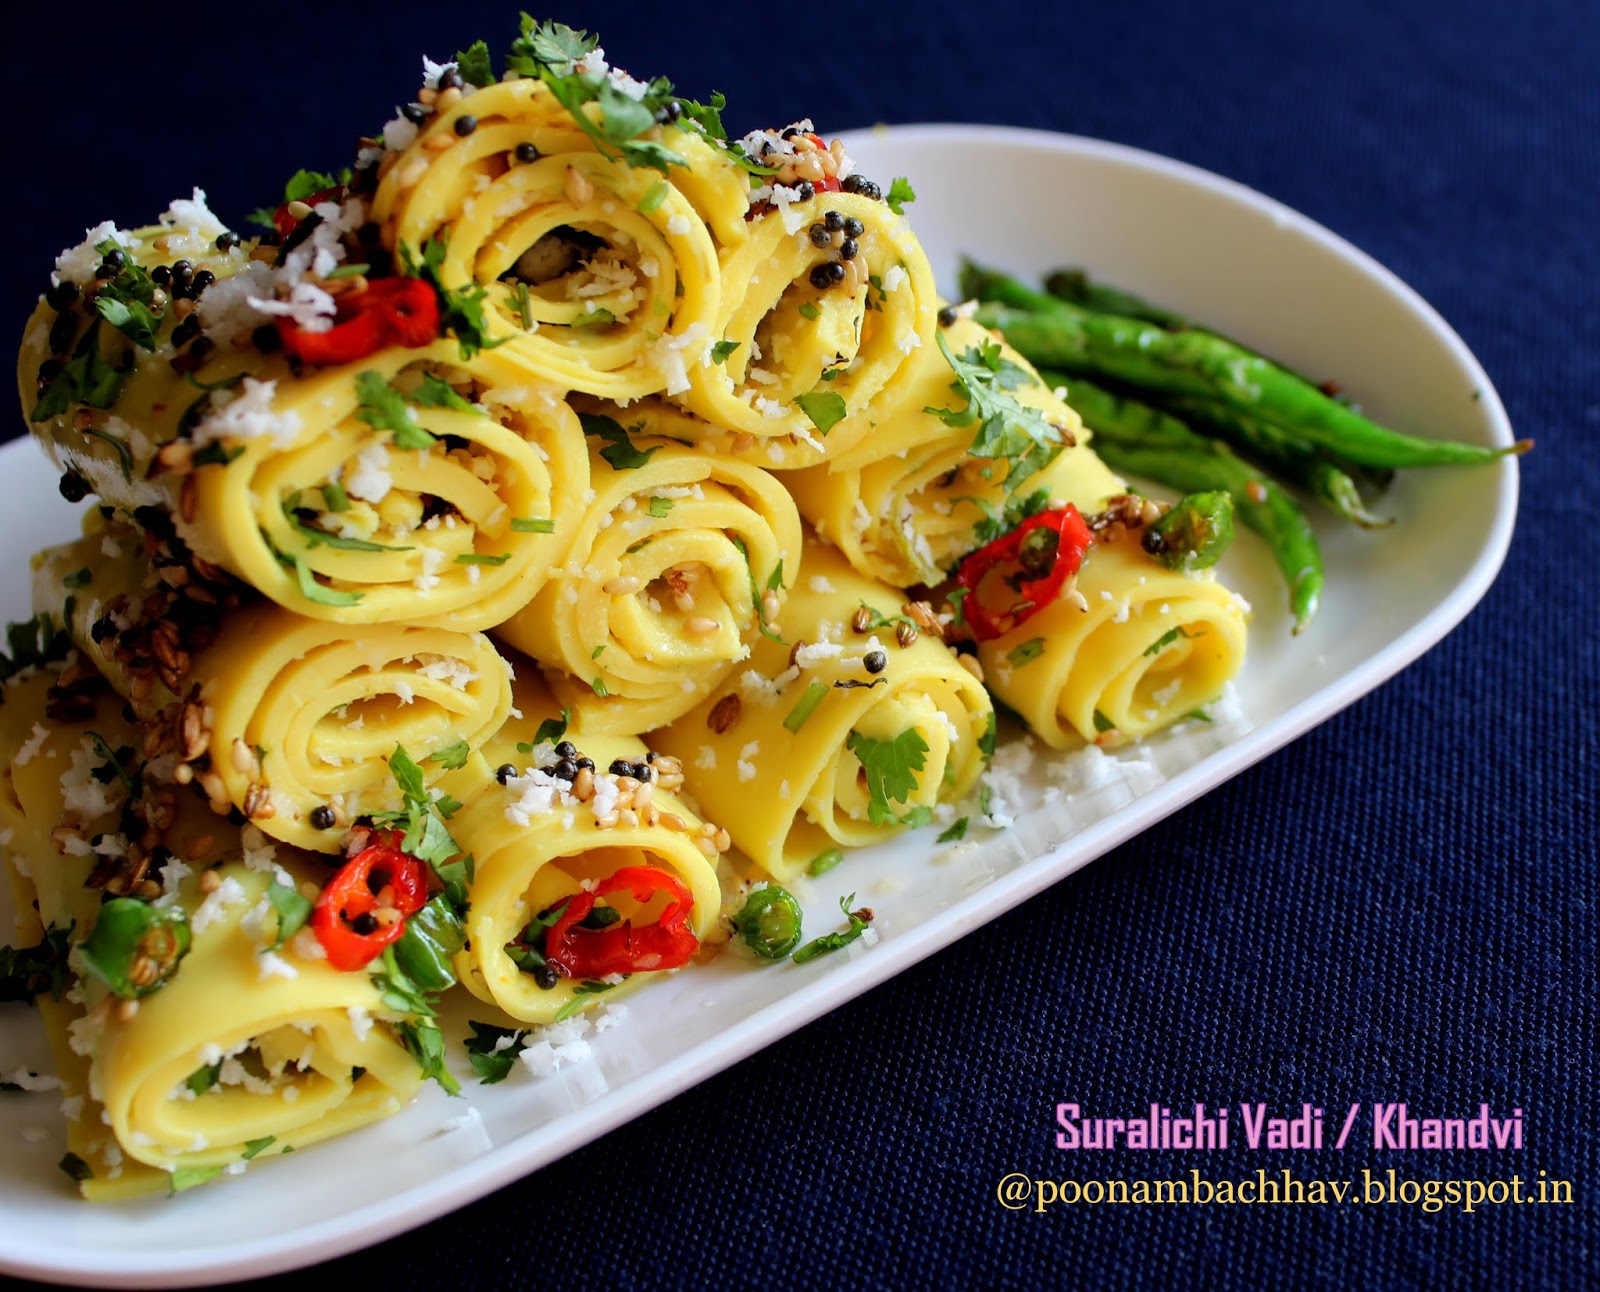
Suralichi Vadi also known as khandvi is a flavorful and healthy, savoury steamed snack popular in the Indian states of Maharashtra and Gujarat. It is gluten-free and consists of lip-smacking, bite-size, tightly rolled pieces made of gram flour and yogurt with a delicious tempering and garnishing. Khandvi is mildly spiced, with a sweet and tangy flavor and a soft, silky, melt-in-mouth texture. The traditional method is laborious and one has to be skillful and very precise about the amount of liquid added and the time of cooking, but with this pressure cooker method, making khandvi at home is hassle-free and no more seem like a rocket science. Serve it hot or cold as a starter or a tea time snack. It is an ideal option and often a hit at kitty parties and potlucks.

The theme for #174th #FoodieMondayBlogHop was #Potluck recipes, suggested by Preethi di. Potluck is a shared meal in which separate dishes are cooked and brought by individual members. Potluck parties allow friends and families to come together and enjoy food and quality time, without putting stress and expense on the hosting family. Festivals and the holiday season are perfect occasions to throw potluck parties. Khandvi is a perfect potluck snack as it can be made in large quantities, does not require reheating, and the bite-size pieces are easy to serve without getting messy.

Before we jump to the recipe, I would like to share some tips, one should keep in mind while making khandvi. Firstly you can use yogurt or buttermilk to make the khandvi. The ratio of chickpea flour to liquid is 1: 2. I have made it using curd. So, I used 1 cup curd, 1 cup water, and 1 cup flour. If you are using buttermilk, take 2 cups buttermilk and 1 cup chickpea flour. Stick to the exact measurements as more amount of yogurt or water would make the khandvi batter sticky and difficult in spreading. We need to spread the cooked batter very fast and as thin as possible on a greased area as the batter tends to cool down quickly and you may have a tough time spreading it as a thin sheet. Grease a large tray or plate with oil before opening the pressure cooker. You may also lay an aluminium sheet on a table and grease it so that spreading becomes easy. So let's get started.
Preparation time: 20 minutes
Cooking time: 20 minutes
Serves: approx 30 bite-size khandvi pieces
Ingredients for Khandvi batter : Measurement used - 1 cup = 200 ml
- 1 cup chickpea flour / Besan
- 1 cup curd
- 1 cup water
- 1 tablespoon sugar
- 1/4 teaspoon turmeric powder
- 1 teaspoon green chili and ginger paste
- Salt to taste
- 2 tablespoon oil
- 1 teaspoon cumin seeds
- 1 teaspoon mustard seeds
- 1 teaspoon white sesame seeds
- 1 green chili chopped
- 1 red chili chopped (optional)
- 2 tablespoon finely chopped coriander leaves
- 2 tablespoon grated or scrapped fresh coconut
Method:
- In a container take chickpea flour, curd, salt, sugar, turmeric powder, and green chili-ginger paste. Mix well and add measured water gradually while whisking it to get a lump free batter. The batter at this stage is more of a free-flowing liquid consistency.


2. Take a pressure cooker. Add 2 cups water to it. Place the container with khandvi batter into it. Place the lid and pressure cook for 3 whistles on low medium flame. While the batter is getting cooked, grease the tray, plate or aluminium sheet with oil. Keep all the ingredients for tempering ready. After 3 whistles, put off the flame. Allow the pressure to release naturally.


3. Whisk the cooked batter using a wired whisker and immediately take a small amount of batter and plate it on the greased surface. Spread it in thin sheets, using a greased spatula. Be as quick as you can at this stage as the batter becomes difficult to handle on cooling. Spread all the batter on greased plates and trays similarly.


4. Sprinkle chopped coriander and scrapped coconut over the sheets of khandvi. Now with a pizza cutter, cut the sheets into vertical lines. Roll each sheet carefully into tight rolls and place on serving plate.


5. Now, prepare tempering by heating oil in a small pan. add mustard seeds. Once they splutter add cumin seeds followed by sesame seeds and chili pieces. Allow the tempering to infuse into the oil for a few seconds.

6. Put off the flame. using a spoon, pour the tempering over the khnadvi rolls and serve the delicious khandvi or suralichi vadi either plain or with some dip or sauce of your choice. we love it with fried and salted green chilies.

Recipe Notes:
- Khandvi can be made using curd or buttermilk.
- The ratio of chickpea flour to liquid is 1: 2. I have made it using curd. So, I used 1 cup curd, 1 cup water, and 1 cup flour. If you are using buttermilk, take 2 cups buttermilk and 1 cup chickpea flour. Stick to the exact measurements as more amount of yogurt or water would make the khandvi batter sticky and difficult in spreading.
- You have to be very fast while spreading the khandvi batter as it becomes difficult to handle on cooling and you may not be able to make thin uniform sheets with the batter.
- Kandvi can be served hot or cold as a tea time snack.
- Khandvi tastes good as it is but you may serve it with dip or sauce of your choice. I have served it with deep fried salted green chilies.
- You may use large trays or aluminium sheets that are greased for spreading the khandvi batter.
- If you are making khandvi during winter season when it is quite possible the batter may cool down fast, place the khandvi batter bowl in the cooker itself and take the required batter from it.
If you ever try this recipe, do share your feedback with us in the comment section below.
For more recipes that can be cooked and taken to potluck parties, check out the following links


I would never attempt making something as complicated as this for a potluck party! You're great. :) This looks just awesome!
ReplyDeleteWow amazing it looks Poonam. Tgough i make in oven but never tried in pressure cooker. Will surely give it a try someday. Lpved the detailed recipe.
ReplyDeleteWOW! Nice article and writing style is also so good. Thanks for Sharing.
ReplyDeleteNepali Patro
Wow my most favourite dish but never tried. Thanks for the detailed recipe. Loved your click. Awesome share.
ReplyDeletePoonam, you've made my all time favorite. I had made khandvi on Monday and then later on saw your post. I'll have to try making the batter in a pressure cooker as I spend time mixing it in a pan.
ReplyDeletePoonam - for years I have been looking for a fool proof recipe for Khandvi and I think this is THE one ! Wonderful to see use of the pressure cooker ! Lovely lovely dish :)
ReplyDeleteWe love Khandvi but I always dreaded to make it, what if it doesn't come out well and gets wasted. Here in US we miss all this stuff that we got from stores, with you recipe I think I can give a try!!It looks so perfectly made and rolled up!! Thanks for sharing.
ReplyDeleteWow, i always thought that the khandvi was such a laborious job, you made it look so easy. I will follow this step by step to do your style.
ReplyDeleteThe entire stack of my favourite snack is make me absolutely hungry. Poonam, loved the pressure cooker method and ease of making the dish. Beautiful shots!
ReplyDeletewow!!!You make it look so simple. I have made this once but your pictorial and method seems more doable. Lovely share and beautiful presentation
ReplyDeleteKhandvi using Pressure Cooker sound intersting dear Poonam !!! lovely pick for theme as well...
ReplyDeleteA pressure cooker works on a simple principle: Steam pressure. A sealed pot, with a lot of steam inside, builds up high pressure, which helps food cook faster.
ReplyDelete